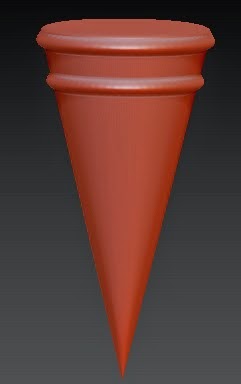
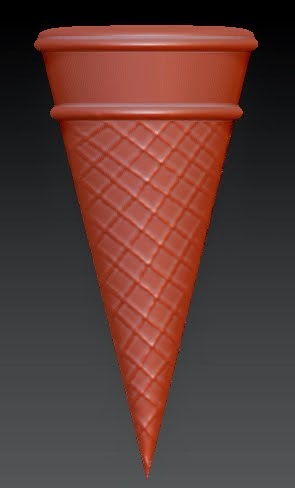
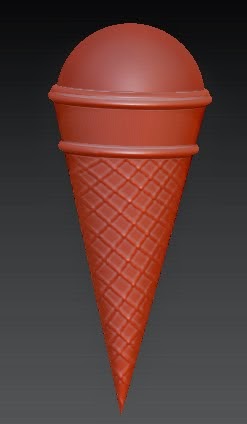
In this tutorial, you will create an ice cream cone and sculpt it using different brushes. The final output of the ice cream model is shown in Figure 4-1.
 |
| Figure 1 |
The following steps are required to complete this tutorial:
a.
Create the cone.
b.
Create the ice cream scoop.
c.
Save the model.
Creating the Cone
In this section, you will create an ice cream cone using the Cone 3D primitive and sculpt it using different brushes.
1.
Choose the Init ZBrush button from the Preferences palette; ZBrush is initialized to its default state.
2.
Choose the Current Tool button from the Tool palette; a flyout is displayed. Choose the Cone3D primitive from this flyout.
3.
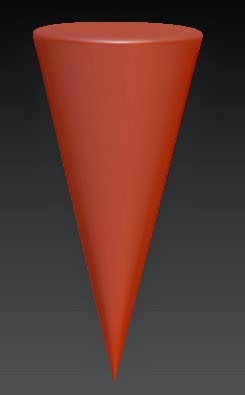
Press and hold the left mouse button, and then drag the cursor in the canvas; a cone is created in the canvas, as shown in Figure 4-2.
 |
| Figure 2 |
4.
Choose the Edit button from the top shelf.
5.
Press and hold the left mouse button and drag the cursor downward in such a way that the cone rotates and stands vertically. While dragging the cursor, press the SHIFT key; the cone is snapped at right angle to the canvas, refer to Figure 4-3.
 |
| Figure 3 |
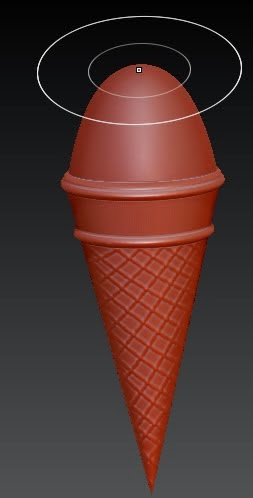
6.
Expand the Initialize subpalette in the Tool palette. In this subpalette, set the values of both the X Size and Y Size sliders to 50, refer to Figure 4-4; the radius of the cone decreases.
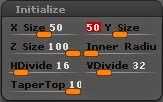 |
| Figure 4 |
7.
Choose the Make PolyMesh3D button from the Tool palette; the cone is converted into a polymesh. After converting the cone into a polymesh, you need to subdivide the geometry so that the number of polygons in the cone increases to make it smoother.
8.
Set the value of the SDiv slider in the Geometry subpalette to 5 by clicking on the Divide button four times; the cone becomes smoother, refer to Figure 4-5.
 |
| Figure 5 |
9.
In the SubTool subpalette, choose the Rename button; the Please enter subtool title window consisting of a text box is displayed. Enter ice cream cone in this text box and press ENTER; the Cone3D primitive is renamed as ice cream cone.
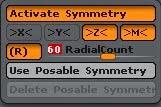
10.
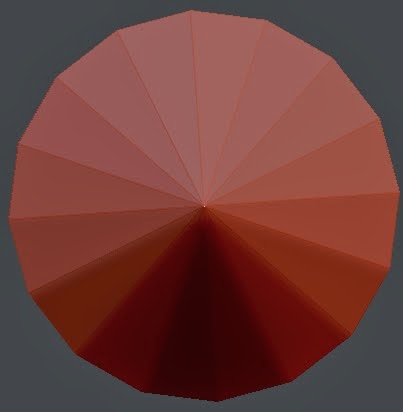
In the Transform palette, choose the Activate Symmetry button. Next, choose the (R) button; the RadialCount slider is activated. By default, the >X< button is chosen. To deactivate this button, choose it again. Next, choose the >Z< button; the radial symmetry in the Z-axis is activated. Click on the RadialCount slider to display the RadialCount edit box. Next, enter the value 60 in the RadialCount edit box, refer to Figure 4-6.
 |
| Figure 6 |
11.
Choose the Current Brush button from the left shelf; a flyout containing different sculpting brushes is displayed. Choose the Standard brush from this flyout.
12.
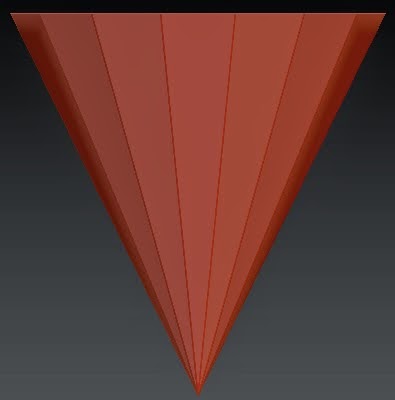
Set the value of the Draw Size slider to 30. Next, press and hold the left mouse button, and create the patterns at the top of the ice cream cone, as shown in Figure 4-7.
 |
| Figure 7 |
13.
Choose the Current Brush button from the left shelf; a flyout containing different sculpting brushes is displayed. Choose the Layer brush from this flyout. In the Transform palette, choose the (R) and >Z< buttons; the radial symmetry in the Z-axis is deactivated.
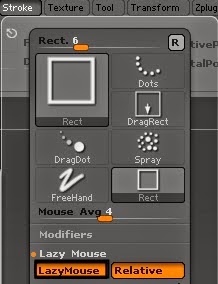
14.
Expand the Stroke palette. In this palette, expand the Lazy Mouse area. Next, choose the LazyMouse button in this area, as shown in Figure 4-8.
 |
| Figure 8 |
The LazyMouse option will enable you to draw the patterns very conveniently by dragging the red colored line that appears on choosing the LazyMouse button.
15.
Set the value of the Z Intensity and Draw Size sliders to 15 and 12, respectively. Next, press and hold the left mouse button and drag the cursor to create a crisscross patterns on the entire surface of ice cream cone, refer to Figure 4-9.
 |
| Figure 9 |
Creating the Ice Cream Scoop
In this section, you will create the ice cream scoop using the sphere and different sculpting brushes.
1.
Expand the SubTool subpalette in the Tool palette. In this subpalette, choose the Append button, as shown in Figure 4-10; a flyout is displayed. Choose the Sphere3D primitive from this flyout; a sphere is created in the canvas and it overlaps with ice cream cone, as shown Figure 4-11. The thumbnail for the sphere is displayed in the SubTool list. Select the thumbnail of the sphere in the list and then rename it to scoop using the Rename button.
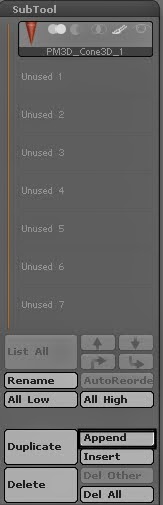 |
| Figure 10 |
 |
| Figure 11 |
2.
Choose the Move button from the top shelf; an action line is displayed. Next, press and hold the left mouse button and drag the cursor on the surface of the sphere; the size of the action line increases.
3.
Hover the cursor at the centre of the middle circle of the action line, refer to Figure 4-12. Next, press and hold the left mouse button and drag the cursor upward to move the sphere at the top of ice cream cone.
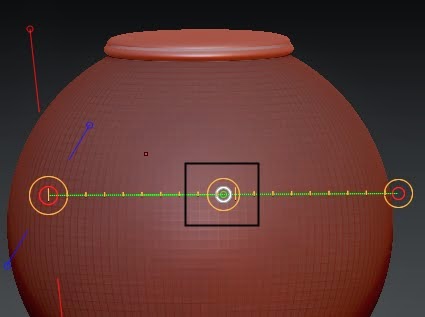 |
| Figure 12 |
4.
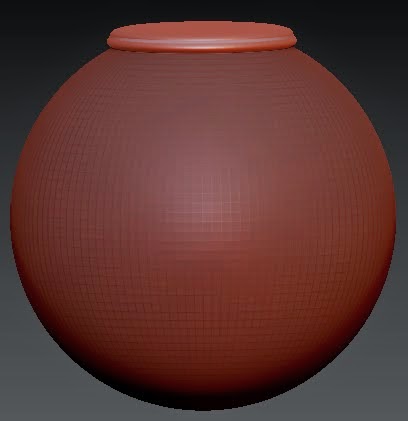
In the Geometry subpalette of the Tool palette, set the value of the SDiv slider to 5, by clicking on the Divide button four times; the sphere becomes smoother.
5.
Expand the Deformation subpalette in the Tool palette. In this subpalette, move the Size slider toward left so that the size of scoop decreases and fits into the radius of the cone, as shown in Figure 4-13.
 |
| Figure 13 |
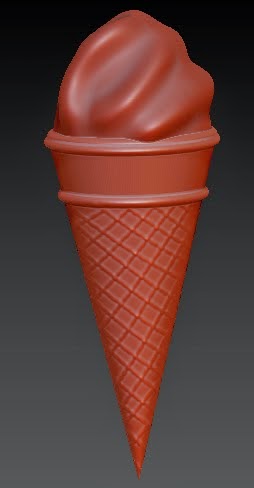
6.
Choose the Draw button from the top shelf and then choose the Current Brush button from the left shelf; a flyout containing different sculpting brushes is displayed. Choose the Move brush from this flyout.
7.
Set the value of the Draw Size slider in the top shelf to 250. Next, press and hold the left mouse button and move the top portion of scoop upward, as shown in Figure 4-14.
 |
| Figure 14 |
8.
Choose the Current Brush button from the left shelf; a flyout containing different sculpting brushes is displayed. Choose the Standard brush from this flyout.
9.
Set the value of the Draw Size and the Z Intensity sliders to 80 and 25, respectively. Next, press and hold the left mouse button and drag the cursor on the surface of scoop to create bumps in the scoop, as shown in Figure 4-15.
 |
| Figure 15 |
10.
Again, choose the Current Brush button from the left shelf; a flyout containing different sculpting brushes is displayed. Choose the Spiral brush from this flyout.
11.
Set the value of the Draw Size and the Z Intensity sliders to 200 and 100, respectively. Next, press and hold the left mouse button and drag the cursor on the top of scoop to create its tip, refer to Figure 4-16.
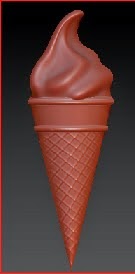 |
| Figure 16 |
Saving the Model
In this section, you will save the file by following the steps given next.
1.
Choose the Save As button from the Tool palette, the Save ZTool dialog box is displayed. In this dialog box, browse to the location \Documents\ZBrushprojects\c04.
2.
Enter c04tut1 in the File name edit box and then choose the Save button.

No comments:
Post a Comment